Storage
Creating FreeNAS
Create a FreeNAS Instance
- From the administrative panel on the left side of the screen select “My Cloud” > “Create New Server”.
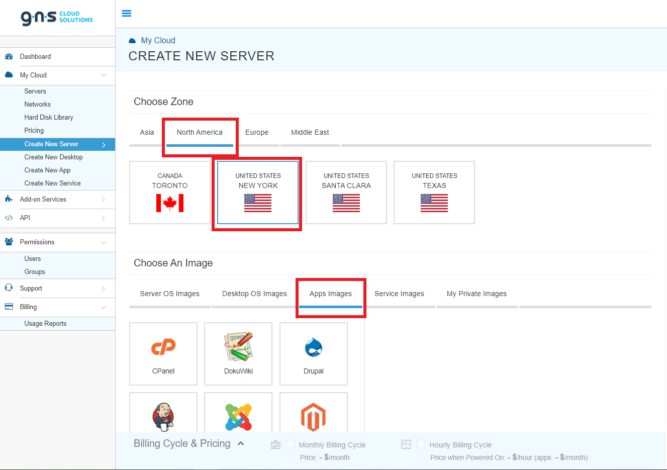
- Select an appropriate zone and datacenter location.
- Navigate to the “Service Images” tab.
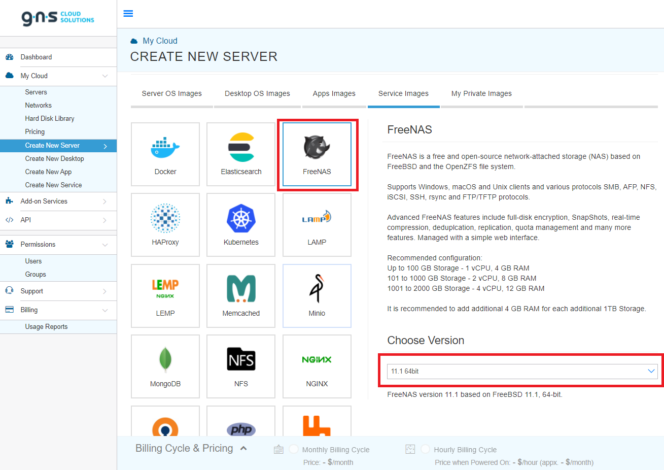
- Under “Service Images” select FreeNAS, then choose the latest version.
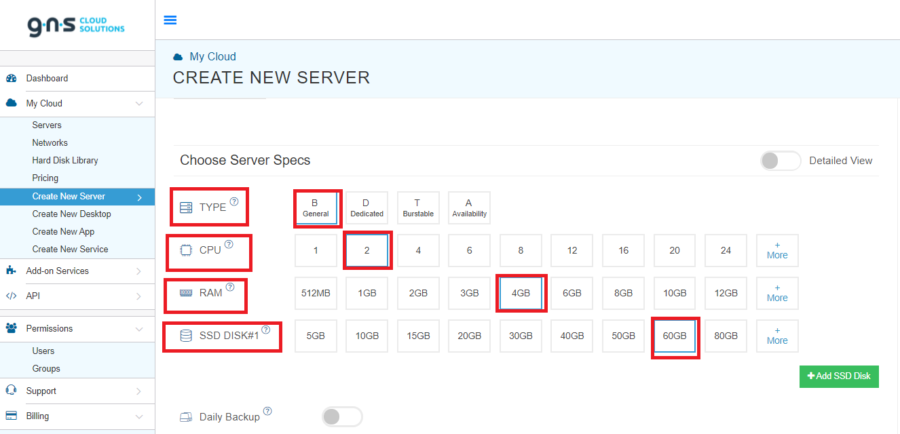
- Scroll down to “Choose Server Specs” (below the service image options) and select preferences for TYPE, CPU, RAM, and DISK.
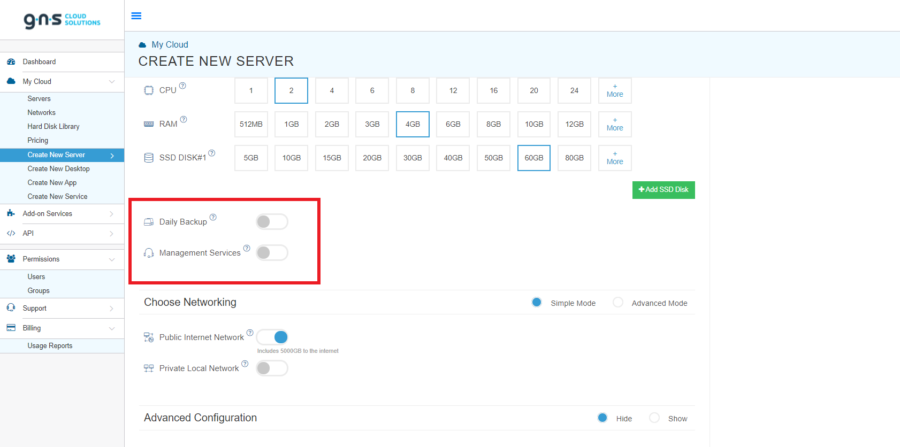
- Daily Backup and Management Services can be activated directly below the server specifications section.
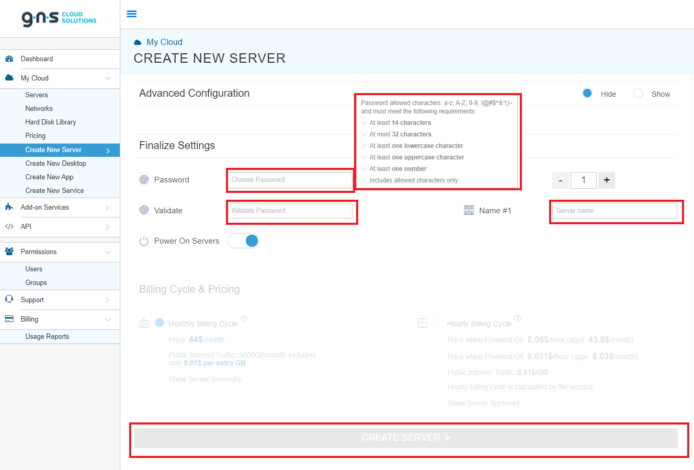
- Continue scrolling towards “Finalize Settings”. Create a server name and create and validate an appropriate password. Note the password requirements. Select CREATE SERVER when finished.
