Creating Pfsense Firewall And Setting Up A Server Behind FW
We will perform the following steps:
1. Creating a new VLAN for the internal network between the server and FW.
2. Creating a new Pfsense firewall with the console
3. Setting up a Gateway in VLAN in favor of setting up new servers behind PFSense
4. Transfer server behind PFSense using the automated interface
5. Setting up NAT 1: 1 in PFSense
Creating a new VLAN for the internal network between the server and FW:
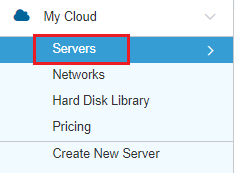
1. After connecting to the management interface, in the left menu, select the My Cloud tab, and in the menu that will appear under this option, select Networks.
2. In the middle window, we will select the Datacenter where we want to establish the environment, and then on the right side at the bottom of the screen, a Create New Network button will appear in green. Click on it.![]()
3. In the window that pops up in the center of the screen, select the new VLAN settings: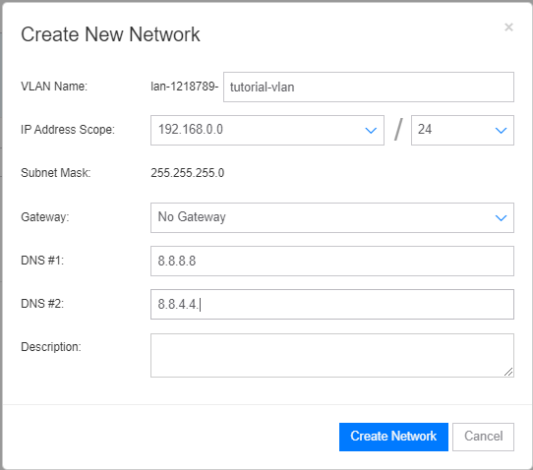
In the image above, we set up a VLAN called tutorial-vlan and chose that its internal address range would be 192.168.0.0/24 and the DNS servers are from Google (8.8.8.8, 8.8.4.4).
* It is essential not to select Gateway at this time. We will change the setting after setting up the FW.
When you have finished entering the settings, click on Create Network at the bottom of the window.
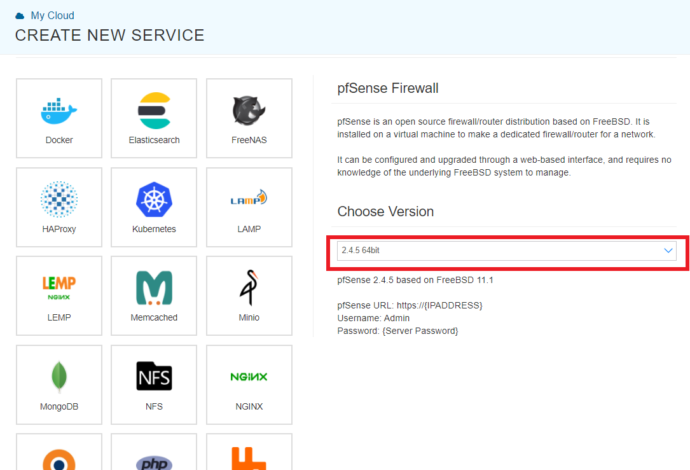
Creating A New Pfsense Firewall With The Console
1. After setting up the VLAN, go to the Create New Server option in the left menu.
2. In the middle of the screen, you will find a window of setting up a server where you have to choose the datacenter to set up the server, which operating system to choose, the server specifications, name, and password.
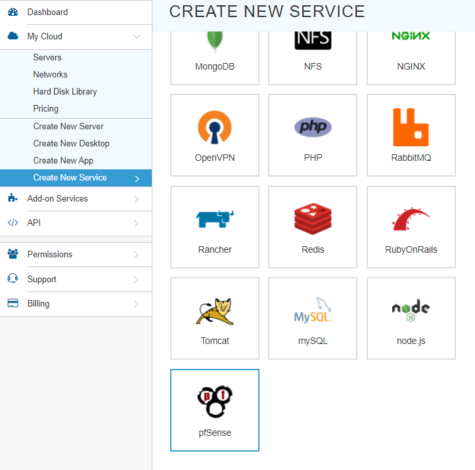
Make sure that in the type of operating system, first select the Apps and in the drop-down menu, select the PFSense option as in the image below:
In the server specification, we have chosen the minimum specification necessary for PFSense: one processor, 1GB of memory, and 10GB of disk space.
Make sure to follow the server specifications as provided to you in the ticket.
3. Below the specification selection, the part related to communication will appear. We will go into Advanced Mode and click on the green Add Network button in the right corner. Then we will see a new network card called NIC # 2. IP
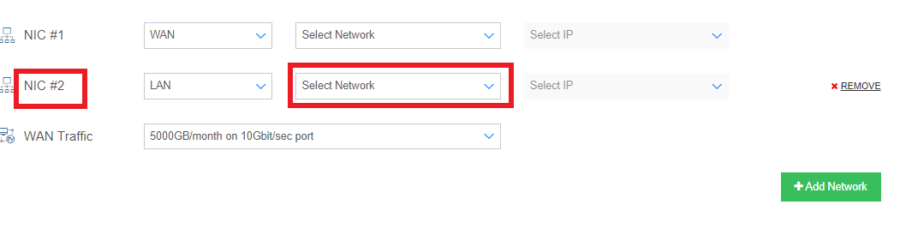
In the example above, we have chosen that the FW be configured with address 192.168.0.254, which would also be the gateway of the server we will set up later in the guide.
When you have finished entering all the relevant details for setting up the server, click on the green Create Server button at the bottom of the screen and wait for the server to finish setting up.
Setting Up A Gateway In VLAN In Favor Of Setting Up New Servers Behind PFSense:
1. Similar to the first step in this guide, in the left menu, select the My Cloud tab, and in the menu that appears below this option, select Networks.
2. In the middle window, selects the Datacenter where we set up the VLAN and PFSense in the previous steps, and in the search window, we will list the name of the VLAN. In our case, it is tutorial-vlan
3. After we search for the VLAN and find it, we click on the OPEN button to the right of the VLAN details.
4. After opening the VLAN information in the previous step, the range of IP addresses that we defined when setting up the VLAN will be displayed in the center of the screen, where the Open button will also be clicked.
5. Navigate to the address (192.168.0.254) in the list of addresses we have chosen to assign to the PFSense server during the setup phase.
Click the Actions button to the right of the address and then the Clear option.

When finished, go back to the top of the page and click close to the right for the address range details.
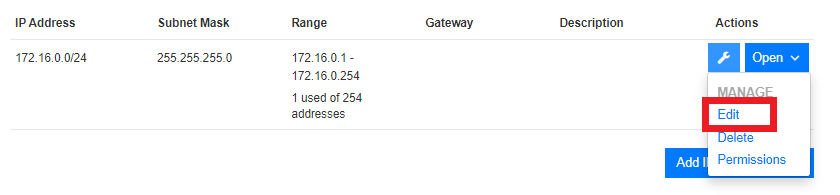
6. Click on a button with a drawing of a Swedish key next to the Open button we clicked on in the previous step. In the menu that appears, select Edit.
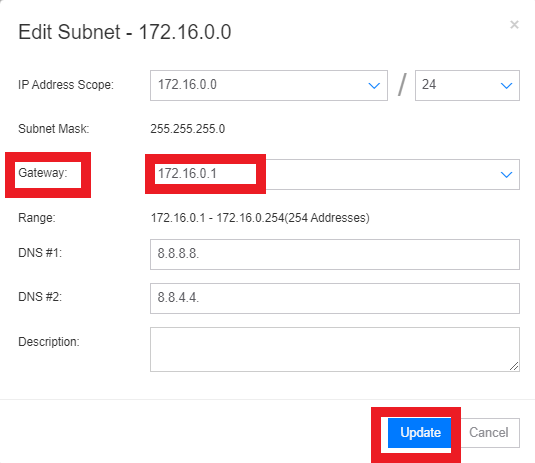
7. In the window that pops up in the center of the screen, we will change the Gateway field to the address we assigned to PFSense during the setup phase (step 4), and at the end, click on Update
After the change, the address’s association removed in the previous step (section 3) can be returned in favor of a good association in the interface.
Transfer Server Behind PFSense Using The Automated Interface:
* This guide refers to the transfer of an existing server. If you go through the guide before setting up the environment at this stage, you should first set up your server and only then continue.
1. Go to the Servers tab in the main menu on the left
And in the search, we will list the server’s name we want to move behind the PFSense.
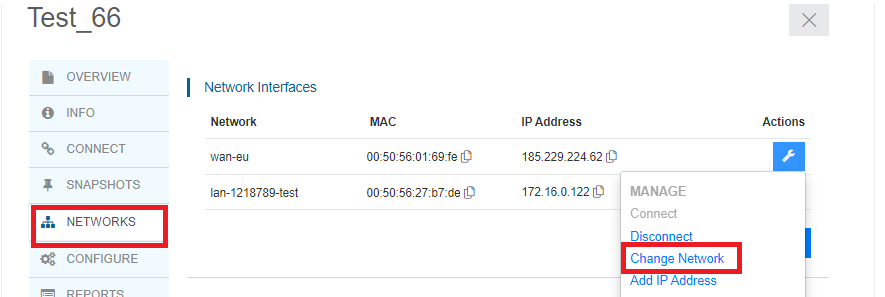
2. To the right of the relevant server information, click on the Open button. In the window that appears with the server information, skip to the NETWORKS tab. To the right of the network information, click on the solution with the drawing of the Swedish key.
In the menu that opens, click on Change Network.
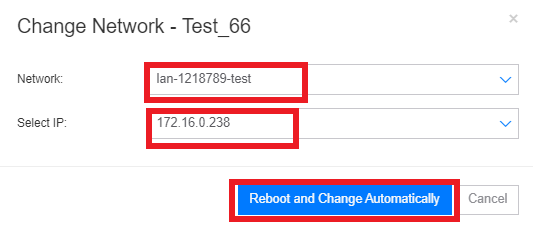
3. In the window that appears in the center of the screen in the Network, we will change to the VLAN that we set up at the beginning of the guide. Select the IP address that we want the server to receive within the internal address range in the Select IP option. When done, click Change.
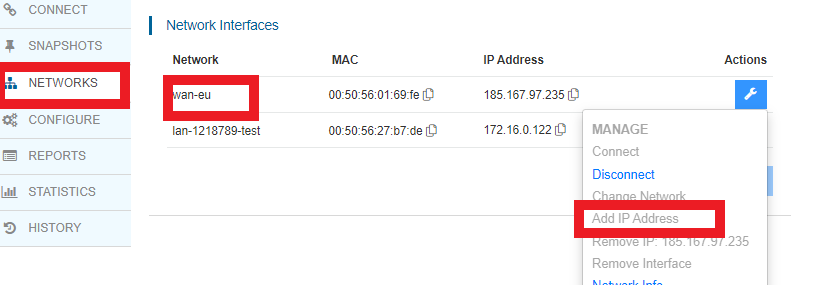
4. While the server is changing the IP and VLAN address, similar to section 1, we will find the PFSense server in the interface and click on the Open button to the right of its details.
Then we jump to the NETWORKS tab, and on the network card connected to the WAN we click on the button with the drawing of the Swedish key, and in the menu that appears, we click on Add IP Address.
5. In the window that opens in the center of the screen, we will leave Select IP on Auto and press the button
Add IP and Configure Manually, as highlighted in the image below.
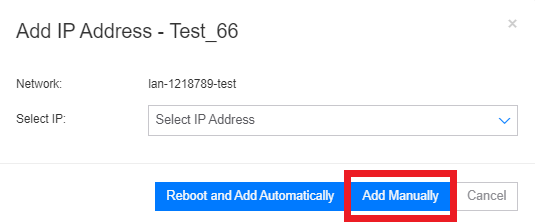
6. At the end of the assignment process, you will see that a new valid IP address has been added to the network card connected to the WAN. Write it down for convenience and for future use of this guide.
Setting Up NAT 1: 1 In PFSense:
After completing the previous steps, you must connect to PFSense. If this is your first time logging in to this type of FW, make sure to use HTTPS, the first IP you’ve set.
The username is admin, and the password is the same password you set during the setup phase.
1. After connecting to the PFSense management interface, click on the Firewall option in the top menu. In the menu that appears below this option, click on Virtual IPs.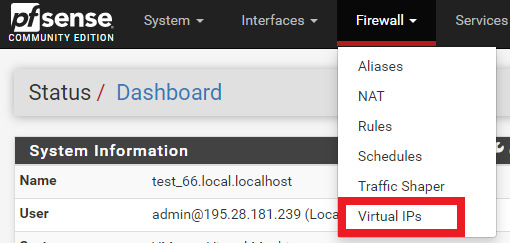
In the window we arrive at, there will be a green button with a drawing of + and the caption Add ![]() in the right part of the screen. Click on it.
in the right part of the screen. Click on it.
In the screen that appears, enter information according to the following parameters:
Type = IP Alias
Address (es) = The IP address we added to the server and recorded on the side in section 19 (in the example below, I wrote down X.X.X.X for demonstrating where to register the IP address)
It is essential to set /32 to the right of the IP address because it is a single address and not a range.
Description = Description of the address, in case you want to register one. This is optional.
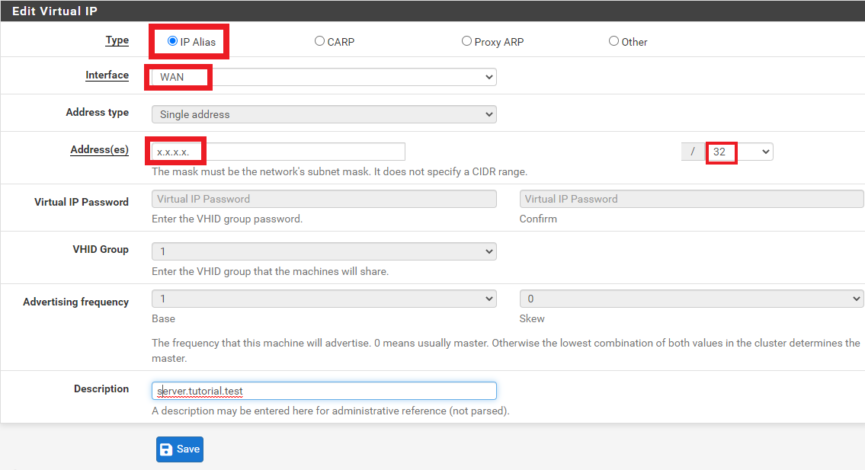
When you have entered the relevant details, click on the Save button at the bottom of the screen. In the window that will appear next, click on the Apply Changes button.
After performing the steps up in the main menu, click on the Firewall option again. In the menu that will open under the option, select NAT.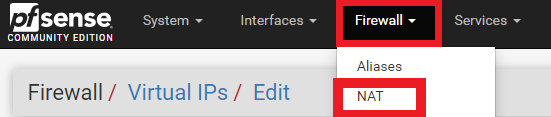
In the window shown in the center of the screen, we will move to the 1: 1 tab and then on the Add button with the drawing of an up arrow.
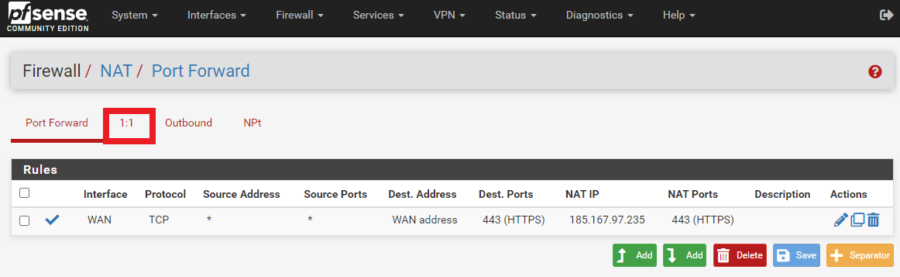
In the NAT setup window, you will be asked to enter the relevant details. Please do not change anything else unless you know what you are doing.
External Subnet IP = the IP address we listed on the side in and defined as Virtual IP (in the example below, I entered X.X.X.X instead of the IP address, the valid IP address should be entered instead)
Internal IP = The internal IP address of the server.
Destination = Must stay on Any; otherwise, the law will not work.
Description = Description of the law – this is optional
When you have finished entering the details, click on the Save button at the bottom of the screen.
In the yellow message that appears on the screen after saving, click on the Apply Changes button.
That is, if everything is set up correctly and according to the guide the server will be able to access the Internet and after setting basic rules in FW that will allow access to it (to the internal address) you can connect to the IP address you kept aside in section 19 and access your server.
